
Edita tu primer vídeo e-learning con OpenShot
Cómo planificar tu primer webinar
Now that you know the OpenShot interface a little better (and if not, you can read our previous guide), it is time to start using it.
Why OpenShot? OpenShot is free, open source video editing software, designed to simplify editing processes with a simple interface, but also includes tools for more advanced editing processes.
In this guide we will explain step by step how to create your first video project. We recommend that before starting to edit the material for your e-learning videos, you make some test videos to familiarize yourself with the tool.
Let's see the basic resources to edit your videos: Import material, cut, fade, move clips and export video.
Shall we start?
1. New project
When you open Openshot, a new project is directly opened.
You can change the project properties from the "Choose profile" button. By default, it is in HD 720p 30fp. We recommend leaving it in this profile or using HD 1080p 30fp if you want a higher quality.
2. Import material
There are 2 ways to export the material to your project:
1- Through the option “Import file” that you will find in the toolbar or by right-clicking on the “Project files” window.
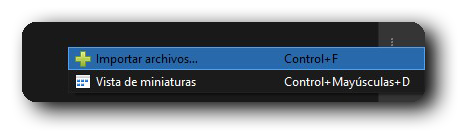
2- Directly dragging the files from your computer to OpenShot.

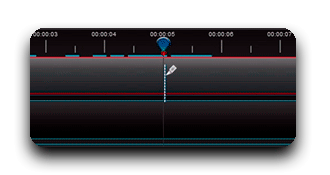
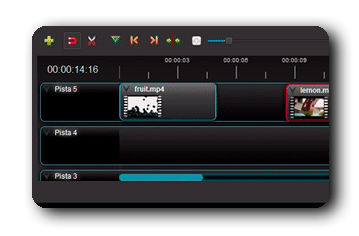
3. Prepare the timeline
The timeline will be our workspace to edit our video.
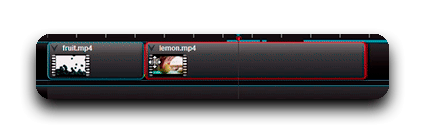
To work out clips, it is so easy to drag the clip from the project window and drop it on the timeline. You can place it on any track and at any point.
Once inside, you can move it.

4. Edit a clip
Once your clip is on the timeline, it's time to edit it. OpenShot offers numerous tools and options to edit your clips, but in this tutorial we will focus on the three most important and basic options to give quality to your e-learning videos: cut and fade.
4.1 Cut
There are different ways to cut a clip, depending on your goal.
First, if you want to divide a clip into several parts, you can use the "Razor" tool. When you have it activated, it will split the clip at the point you clicked. You can split the clips as many times as you like.
Stop selecting the "Razor" tool and delete, move or order the newly created clips.
If you accidentally make a cut, remember that you can click undo or "ctr + z" to go back.
Second, if you want to adjust the start or end of the clip, you can do it very easily. Move the mouse to the edge of the clip, click and drag it to the second you want to shorten.
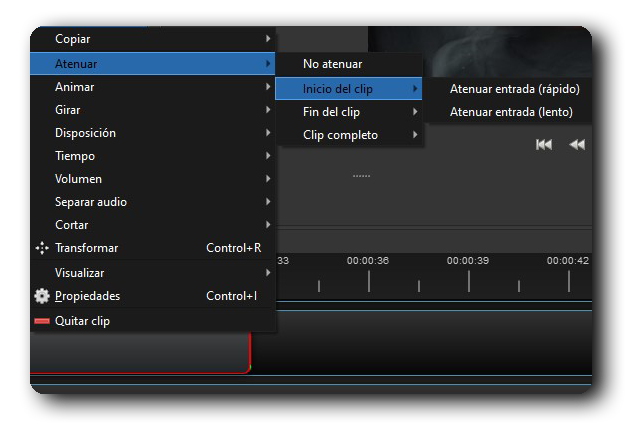
4.2 Fade
The fade option is very useful to give an extra touch to the beginning and the end of the video, or to transition between different clips.
Right-click on the clip you want to apply the effect to and select the "Fade" option.
You can choose if you want the fading to be at the beginning or end of the clip (or both) and the speed at which it occurs (fast or slow).
5. Join clips
When dragging the following clips, we recommend that you always have the "Snap On" option activated. This will automatically snap to the end of the other clip when it zooms in, and you will avoid accidentally leaving blank spaces or overlapping clips.
You can order them following your script and rundown. We recommend that one track be the "master" track where you will place the fragments in order, and one or more tracks to edit each clip individually.
By default, the audio is linked to the video, so you don't have to worry about it being misconfigured.
6. Export video
Once you have your e-learning video ready, it is time to export it and upload it on your training platform.
To do this, click on the "export video" button.
So that your e-learning video has the best quality and is optimized, we recommend these options:
Profile: All formats
Lens: MP4 (h.264)
HD 720p 30fps (1280 × 720) or HD 1080p 30fps (1920 × 1080)
Quality: High or Medium
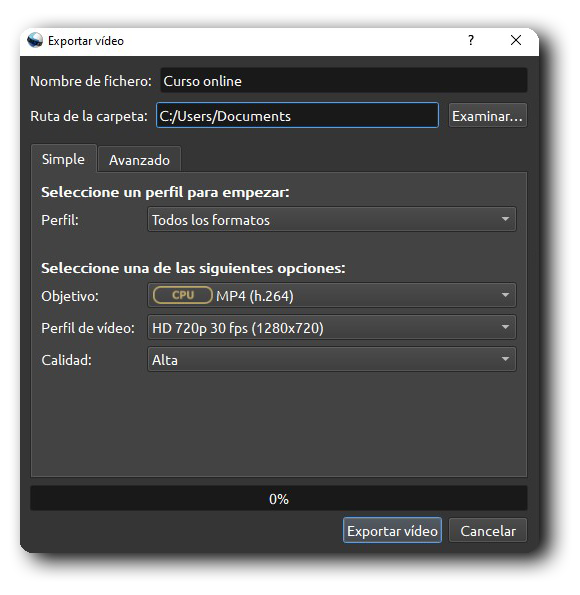 Click export and you're done! Keep in mind that the larger the project, the longer it will take to export. Remember that the Foxize Cloud LMS platform has a weight limit for each video, at 1.5GB. In this post we give you some tips to optimize your videos.

