
Introducción a OpenShot: Descubre su interfaz
10 trucos imprescindibles para sacarle el máximo provecho a Microsoft Teams
OpenShot is free and open-source editing software with a simple and intuitive interface, and it contains all the necessary functions to be able to create quality e-learning videos for your online school.
In one of our previous posts, we gave you 7 reasons to start using OpenShot as a video editor. Today we will take the first steps inside this tool, and we will get to know the Open Shot interface and the main tasks that can be performed in it. If you do not know how to video edit, this guide will be very useful.
Shall we start?
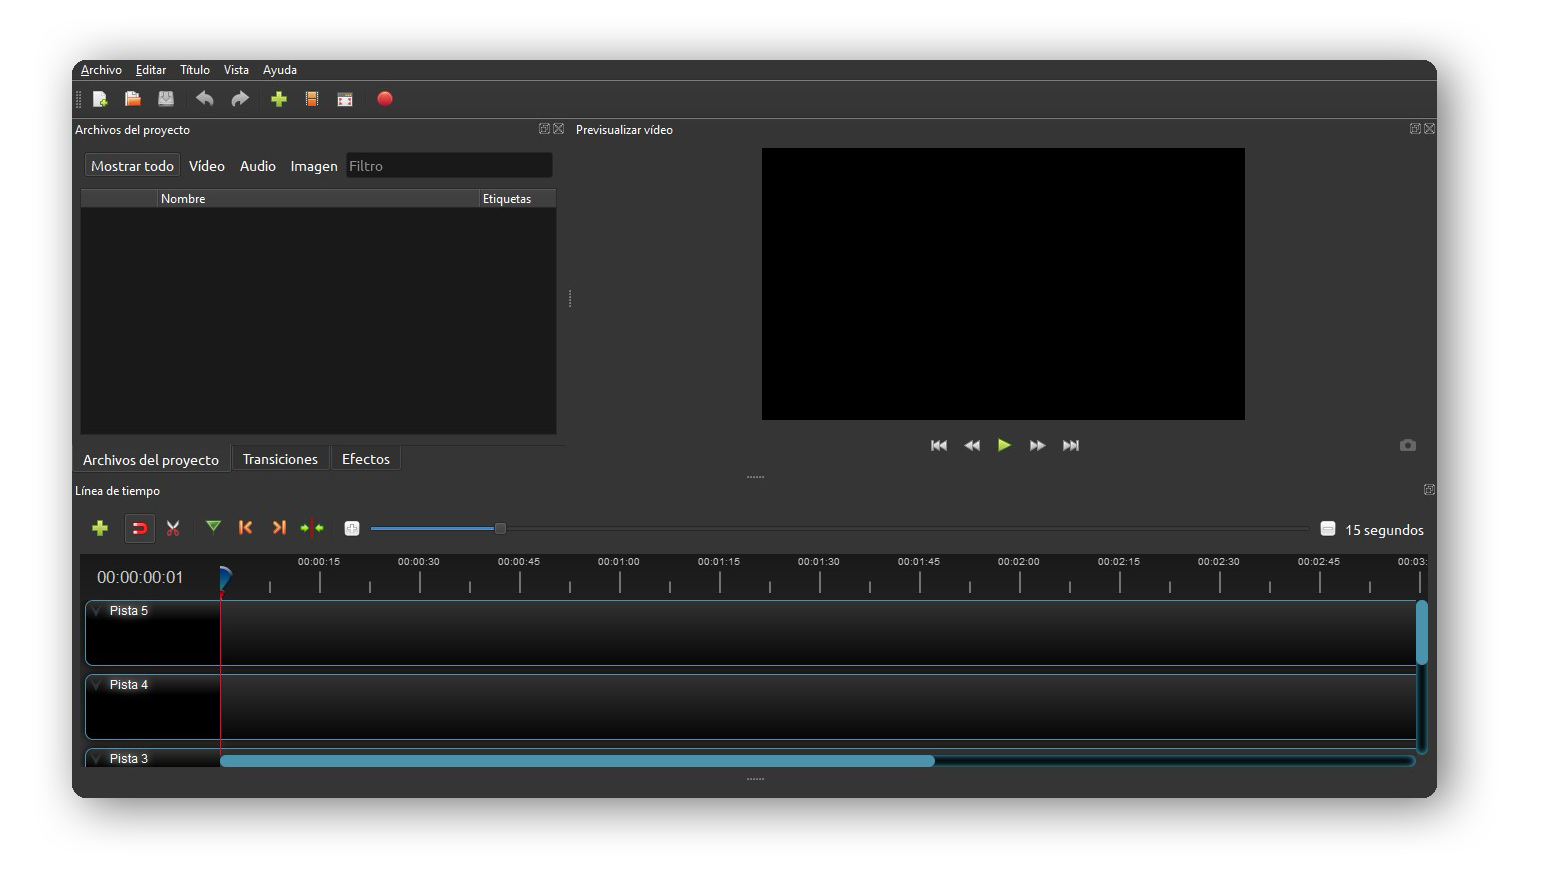
Toolbar

Here you will find all the options related to your project. Let’s look at them from left to right:
- New project. By default, when you open OpenShot a new project is created immediately.
- Open project. To continue working on a started project.
- Save project. Saves the project in .osp format and can only be opened with OpenShot. This option does not export the project in video format.
- Undo action.
- Redo action.
- Import files. The files (videos, audio, images) that will be used in your project. These will be placed in the "Project Files" window at the bottom.
- Choose profile. The video properties of your timeline. By default, it is in HD 720p 30fps
- Fullscreen.
- Export video. To save the project in video format once we have finished editing it.
Libraries
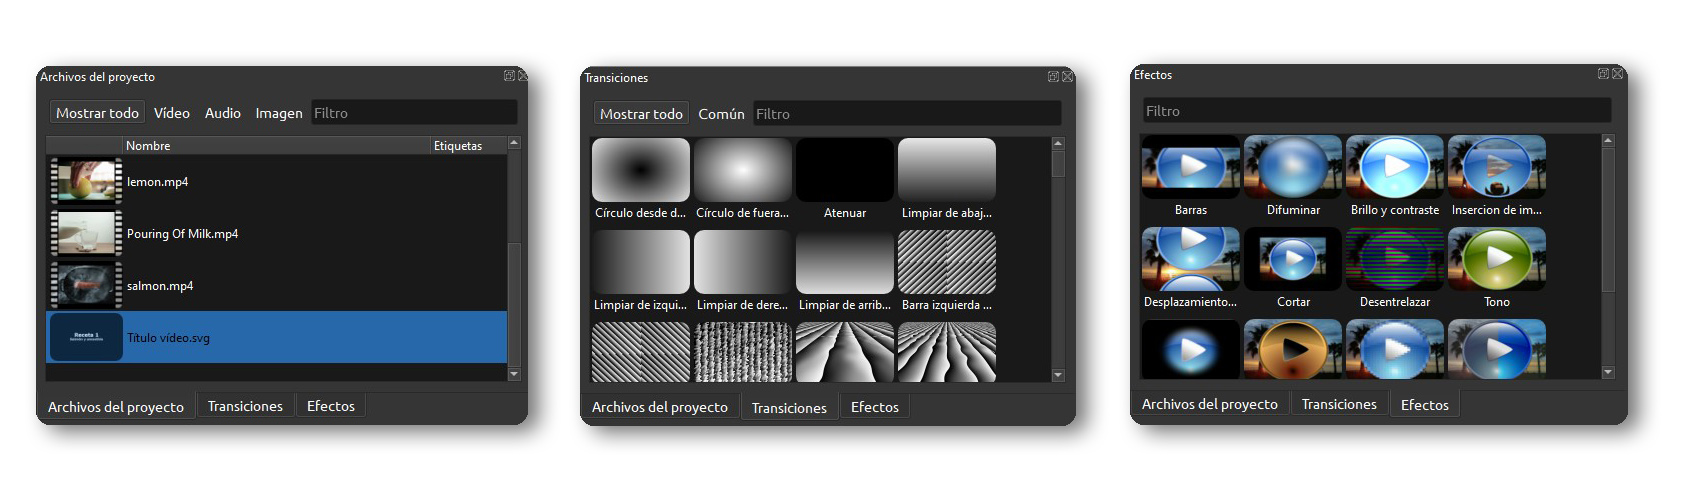
In the libraries, you will find materials and effects to add to your videos.
- Project files. Video, audios, images, titles ... In this window, you will find all the imported material you need to start your project.
- Transitions. Transitions library for your videos.
- Effects. Video effects, from basic effects such as brightness or color balance to more creative ones, like inverted colors.
Video previewer
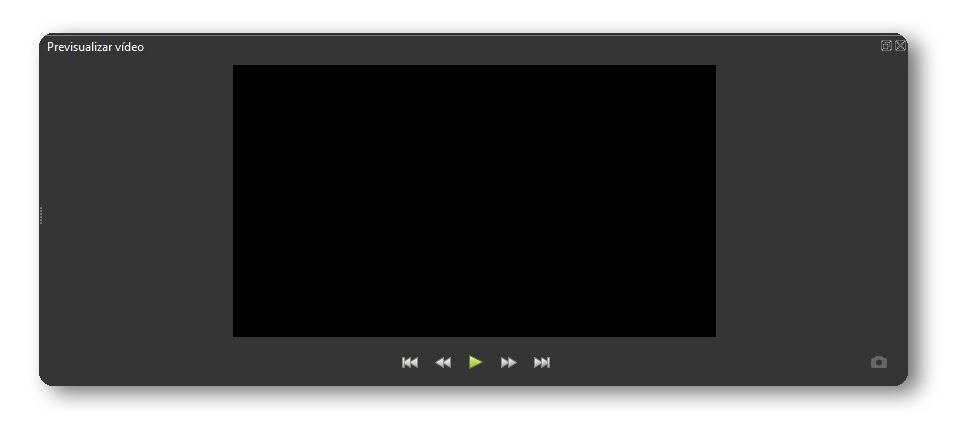
You will be able to see the video you are editing on the timeline. It has the basic options of any player: Play, fast-forward and fast backward.
Timeline
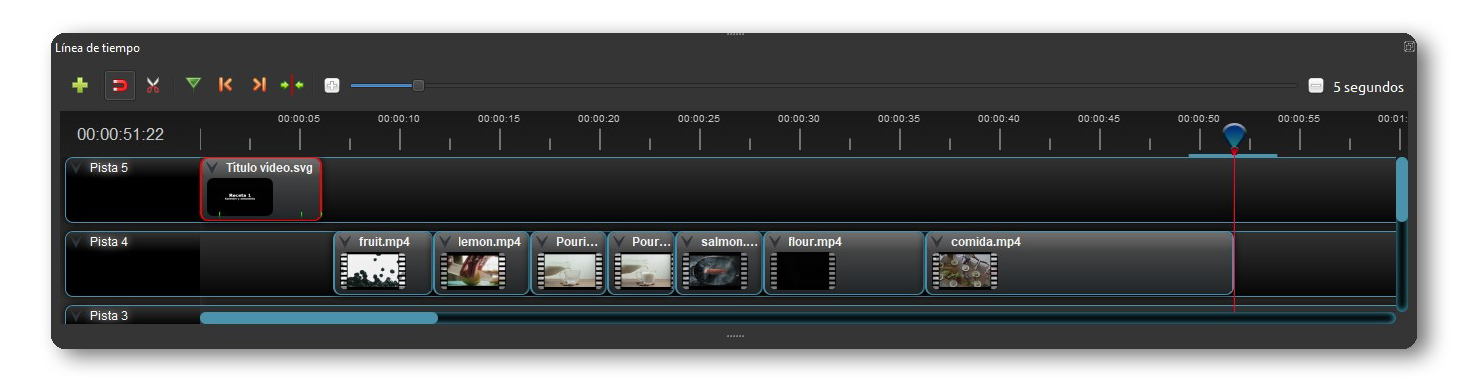
The timeline is where all the editing work happens. At the top left are all the tools for editing clips. Let's look at it from right to left.
- Add track. OpenShot has an unlimited number of tracks. Tracks work as layers, so images overlap and cover those that are underneath.
- Fit. When you move one clip near another, it acts like a “magnet” and they come together right at the cut. Very useful when you want to work with precision.
- Slice. Crop tool. While you have it active, clicking on a clip splits it at the point you clicked.
- Add a bookmark. To record important moments.
- Previous marker. To navigate the bookmarks.
- Next marker.
- Center the timeline on the playhead. Center the vision where the red line is on the timeline.
- Zoom in / out view. To zoom in on the timeline.
We hope that with this guide you can get to know your work environment a little better. In the next OpenShot guide we will explain how to prepare your first e-learning video to upload it to your LMS platform.

